
Insta360 X3 Presets – How To Create & Manage
Using Insta360 X3 presets speeds up the creative workflow greatly. It’s just a matter of pressing the Quick button to access all the presets stored on the camera.
In this article I run through the whole process of creating and managing Presets on the X3. Starting off with how to quickly access them.
Quick Button
The Quick button is located on the side of the X3 camera body. To find the button hold the camera with the LCD screen facing you.
Now, on the right side of the camera you’ll find two buttons. The power button is directly above the Quick button. A single press displays the Preset screen.
Shooting Modes
The X3 has quite a.number of what’s called shooting modes. Each mode offers different ways of capturing video or photos. For example Video Mode unsurprisingly records video. Photo mode takes a Photo etc.
However there are many settings that can be adjusted for each mode. In Video Mode you can adjust the color profile, EV compensation and so on.
Mode Settings
Of course there are many different environments in which to record and create content. You may go from walking outdoors to entering a building. In these instances it’s best to change the camera settings to suit the lighting conditions and location.
Having to manually change the settings is time consuming. So hence the Preset feature on the X3 camera which saves the user a lot of time and hassle.
I will be showing you how to change the settings in another article. For now I just want to make you aware of how to store the camera settings.
What Are Presets
This is where Presets come into play. Presets allow you to store your favourite camera settings for any shooting mode.
Press the Quick button to display all the Presets stored on the camera. Scroll down and select the one you wish to use by a single tap on the screen.
The X3 comes with 5 Preset slots. They are named customize 1 to 5. It’s possible to name the Preset according to the style and mode. Which we’ll take a look at now.
Preset Names
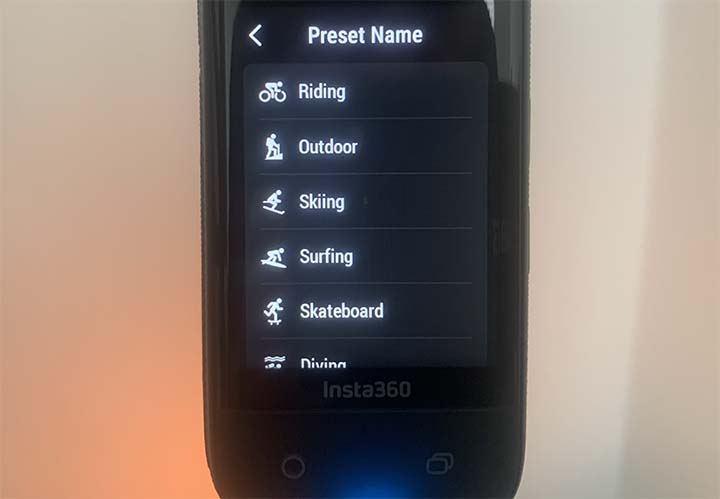
Unfortunately you can’t input a bespoke name, perhaps this is something we’ll see on a later firmware update.
You do however have a number of names denoting an activity. See below for the list.
- Riding
- Outdoor
- Skiing
- Surfing
- Skateboard
- Diving
Then you have the further option of naming the preset customize 1 – 5. You can change the name of an existing preset by tapping the icon next to the name on the overwrite screen.
Creating X3 Camera Presets
I’ll now go through the process of creating a preset on the X3.
- Set the camera to the mode you wish to store as a preset.
- Adjust the settings for the mode.
- Press the Quick button on the side of the camera.
- Tap the plus (+) icon on top right of the LCD screen.
- Set the Preset name.
- Tab the blue tick icon in the bottom right of the screen.
The new preset will now be listed at the bottom of the preset list. If you’ve run out of space to store a new preset you have the option to overwrite an existing one.
Overwrite A Preset
Choose the mode you wish to save along with all the new settings for that mode.
Press the Quick button to display the Preset menu. The 3 dots on the side of the Preset name allow you to overwrite the existing one. Tap the three dots to display an overwrite / delete option at the bottom of the screen. Select overwrite to create a new preset.
If you change your mind tap the cross (X) icon in the top left screen to exit the overwrite screen.
Final Thoughts
Well there you have it, a compressive guide to using presets on the X3
It may not be one of the most exciting features on the camera. However you will be using it a lot when out creating content I’m sure.
I personally have presets for low light filming, bright sunlight, indoor filming to name a few.
That wraps this one up today. Look out for more hints and tips on the X3 that I’ll be sharing soon.