GoPro Ski Helmet Mount
The GoPro ski helmet mount is one of the most popular ways to attach a GoPro for recording skiing action video footage.
The guide demonstrates how to mount Hero 10 Black and Max 360 to a half shell ski helmet.
The techniques are relevant to full shell and to a lesser degree full face ski helmets. If you’re not sure what each style of ski helmet is, take a look at this ski helmet guide.
Adhesive Mounts
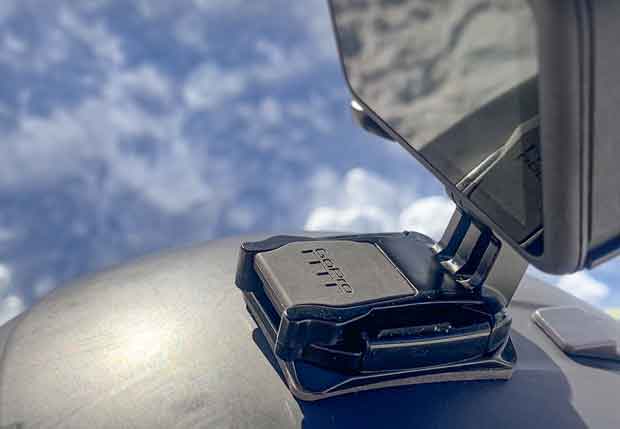
To start off, in most cases you’ll need a curved adhesive mount to attach the camera to your ski helmet. I suggest using GoPro official curved mounts along with 3M adhesive pads.
I have a couple of spare pads in my GoPro accessory kit just in case I need to make a repair. But from my experience when applied correctly the 3M pads are good for a ski season.
How To Apply GoPro Adhesive Mounts
There are a few basic procedures to ensure your adhesive mount is stuck to the ski helmet for maximum adhesion.
It’s worth spending a bit of time on this process as it could be costly if your camera falls off into deep powder lets say.
Decide on where you’d like to place the adhesive mount. Choose between these 4 common positions on the helmet for mounting. We’ll have a look in this article at the pros and cons of each position in a moment.
Mounting postions
- Top of the helmet radius.
- Front middle – Halfway between the top and front peak edge.
- Front lower – Mounted at the edge of the front helmet peak.
- Right side – Directly above the right ear pad.
For the top, front middle and lower positions it is essential to have the mount along the centerline of the ski helmet.
Adhesive Pad Application
This guide uses a curved mount with the 3M adhesive tape already bonded to the base of the mount. You will be removing a single red backing from the underside of the mount in step 7 below.
- Using a tailor’s tape measure, mark the centerline of the helmet with a pencil.
- Draw a long straight line along the centreline marks using the tape.
- Follow the 3M guide to VHB surface preparation – In essence the guide suggests using a 50/50 mix of isopropyl alcohol and water.
- With the above cleaning agent rub the surface with a cloth ensuring the surface is free from any dust or dirt.
- Avoid wiping all of the marked centerline away with the cloth.
- Wipe dry the surface with a clean cloth.
- Placing the curved mount on a flat surface red side up, peel the red backing away from the adhesive.
- Use a sharp pointed object to pierce the corner of the red backing if you have difficulty removing the backing from the closed cell foam adhesive layer.
- With the backing removed on the curved mount, line up the vertical centerline on the curved mount in line with the pencil marked centerline.
- Apply strong pressure using your thumbs and hold for 30 seconds.
- You can use small J clamps if you have some available for added bonding time.
- Leave adhesive to bond for at least 24 hours. 72 hours for optimum adhesion.
J Hook Buckle Mount Base
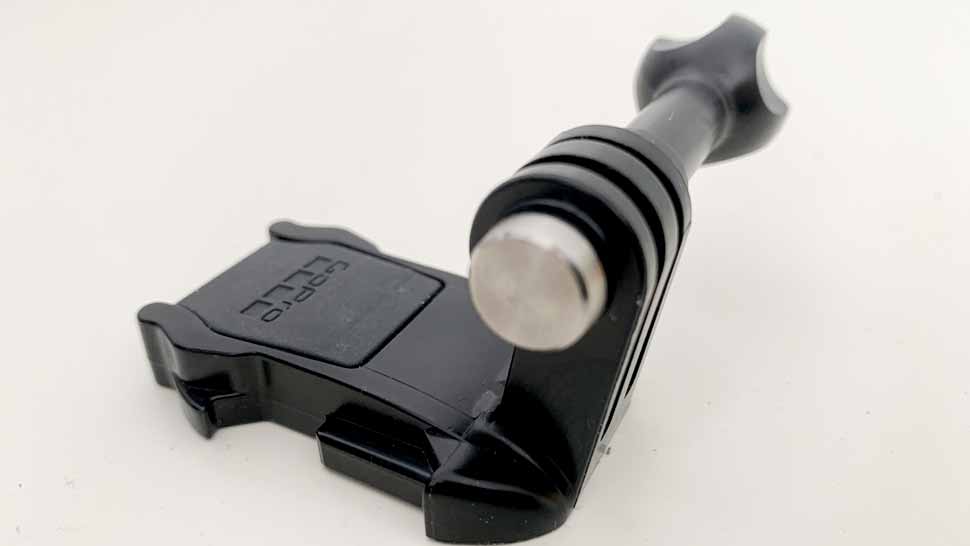
A buckle is the plastic connector that fits into any curved or flat mount. GoPro and other action cameras use two common types of buckle mount bases.
- Flat Buckle quick release base.
- J Hook Buckle quick release base.
The J Hook buckle has an elongated J shaped neck. Because the neck allows for extra angulation compared to a Flat Buckle. For that reason I use the J Hook buckle for ski helmet mounting.
Mounting Positions
Let’s now take a look at where best to stick the adhesive mounts onto the helmet. Also what type of action a camera captures while recording video skiing down the mountain.
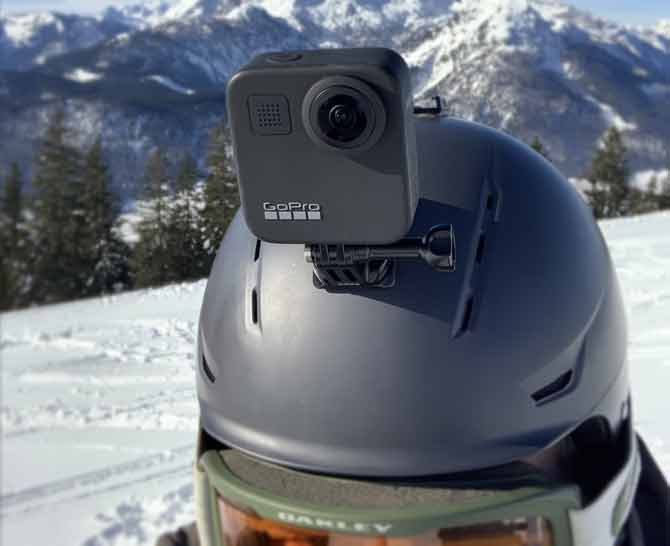
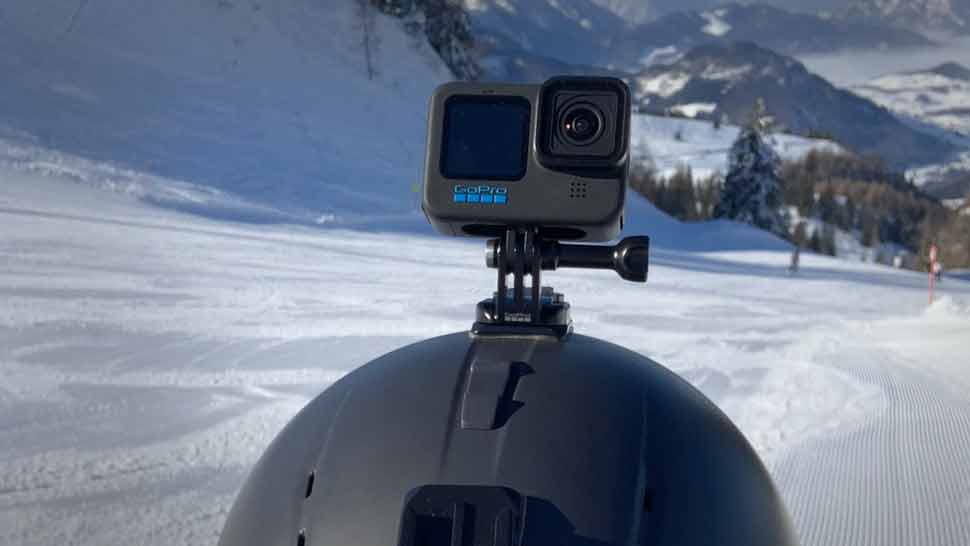
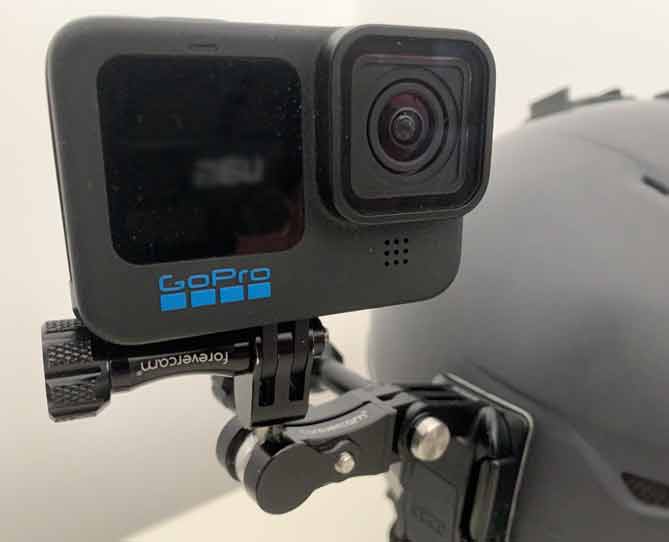
Top Mounted Position
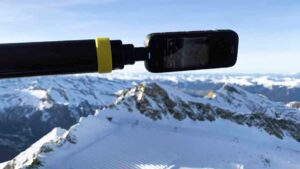
This is a great position for a GoPro Hero Black. The GoPro Max 360 is better suited to the front mounting positions.
As you can see from the picture above, this position is right at the top directly in the middle of the helmet.
Having the GoPro mounted in this position gives the viewer a clear picture of the way ahead, plus views of scenery in the background. This is great for showing what both the terrain or surroundings are like.
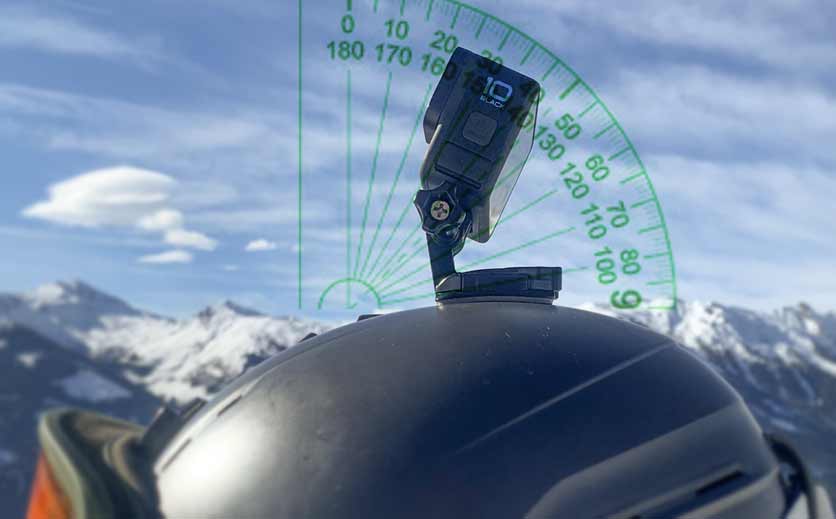
The key is to angle the GoPro at approximately 20 degrees off perpendicular to counter your eye line down the slope. See the picture with the angles in degrees for reference.
Setting this angle avoids having too much slope in frame and not enough scenery of the mountains and sky in the background.
To help in this. A technique I use is to have the Grid switched to ON. With the grid overlay you have a better idea of balancing the shot between foreground, midground and background.
Front Mounted Positions
Mounting the camera closer to the front of the helmet is great for recording more dynamic shots of the skiers hands and feet traversing down the slope.
I prefer to mount the Max 360 at the front of the ski helmet. 360 degree video footage can be reframed in the GoPro Quik app. In doing so you can frame the camera in post production to suit any angle you choose.
Side Mounted Position
The side mount is used to a lesser extent for skiing and is more typical for motorbike riding.
Having said that, it does offer a different POV shot with the side of the helmet with goggles and the side of the skiers face in frame which provides an alternative dynamic action video shot of fast movement.
The 360 degree swivel mount adds versatility to the angles you can set the camera with this setup. You can also use the 360 swivel mount at the front lower position too when filming with the Hero Black.
Final Thoughts
In summary, the top position on the helmet is great for generic skiing video footage using a GoPro Hero camera whichever model you have. Just pay attention to the angle of tilt ensuring the camera is set to approximately 20 degrees as shown in the schematic image above.
For GoPro Max 360 footage I’d suggest placing the camera at the front of the ski helmet for the majority of video footage. Experimentation here is always good practice and of ocurse having fun capturing as many different POV angles as possible to edit into a dymanic action skiing video.
Latest Posts
- Insta360 Extended Selfie Stick Review

- Insta360 X3 Low Light Settings – 360 Video
- Insta360 Go 2 Unboxing – What’s Inside The Box

- Insta360 Go 2 Mount Adapter Bundle Unboxing
- 360 VR Video With The Insta360 X3 Action Camera
- How To Capture A Picture From A GoPro Video