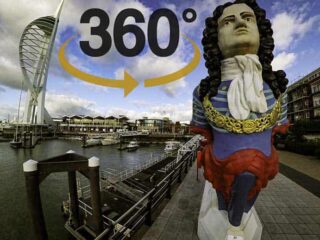
GoPro Invisible Selfie Stick
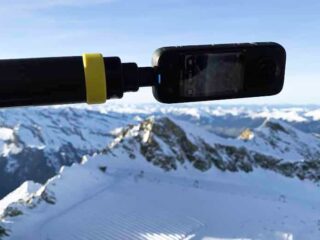
The first time you see a GoPro invisible selfie stick in action, perhaps on YouTube skiing down a slope or maybe mountain biking. You marvel at this incredible video footage and wonder how it’s done.
Well this article will tell you how to get started with your own invisible selfie stick with all the tips and techniques on how to achieve this almost magical footage using the GoPro Max 360 camera.
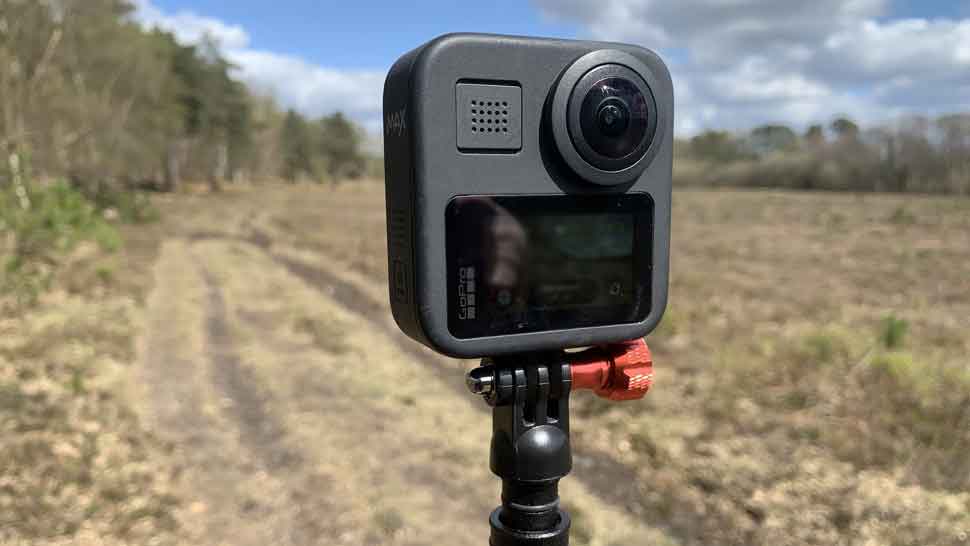
Max 360 Modes
To take full advantage of using a selfie stick to achieve the invisible floating camera POV (point of view) shot. Setting the Max to one of the 360 modes is necessary.
In the main you have a choice of video mode in either 3k at 60 frames per second or 5.6k at 30 fps. There is also 5.6k at 24 fps for a more “filmic” feel to video footage.
You can of course take photos using the selfie stick in this way too. For example you may be standing in front of a landmark or scenic view and want to photograph yourself.
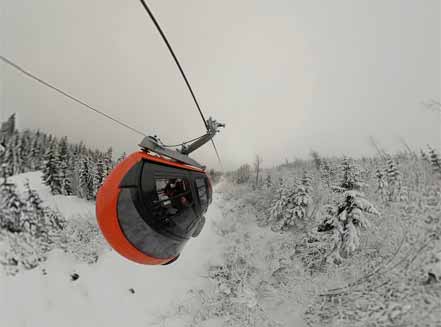
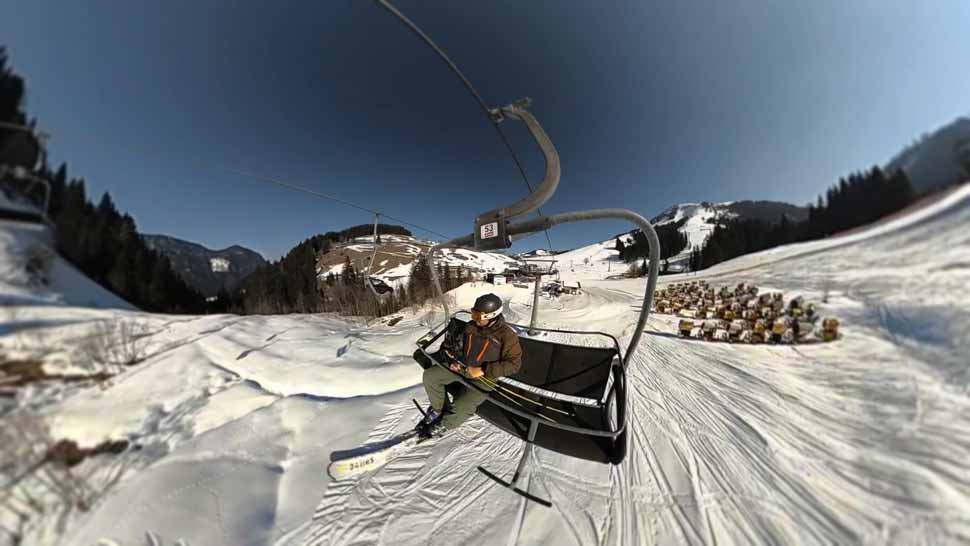
To a lesser extent I use Time Warp Mode in this style of filming. It’s great for riding on a ski chairlift, holding the extended selfie stick and letting the scenery speed past you as an example.
Selfie Sticks

The two selfie sticks I’ve found to be the best for capturing footage while the stick remains invisible are by Insta360 and the second stick I use is the Telesin Ultra Long 2.7m stick.
Let’s have a closer look at these two selfie sticks and I’ll explain the reasons why they make a great choice for GoPro Max 360 users.
Insta360 1.2M Invisible Selfie Stick
This is my most used stick for filming, it’s light with enough extension at 1.2 meters to capture 360 footage in most film locations and environments.
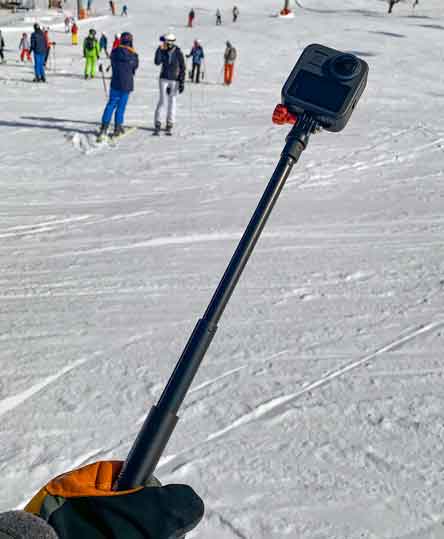
I always have the Insta360 Invisible Selfie stick as part of my GoPro skiing accessories gear. The stick will fit easily into a large ski jacket pocket or daypack at only 23.5cm/9.25in fully closed.
The Insta360 Invisible Selfie stick is of course great for almost any type of activity whether it be for mountain biking, kayaking, hiking or vlogging.
Comfortable in the hand, the stick’s hand grip section is not too large in diameter at 4 centimeters, with a textured non-slip grip, plus it only weighs 139 grams.
My only slight criticism is, the Insta360 stick doesn’t come with a lanyard. Although it does have a ¼ x 20 thread insert at the base of the stick. So fitting an additional lanyard is not a problem.
Technical Specifications
- Material: Aviation-grade Aluminum
- Dimensions: Length 120 x Width 4 x Height 4 cm
- Weight: 139g / 4.90z
- Length fully closed: 23.5cm / 9.25in
- Length fully extended: 126cm / 49.60in
- Top mounting screw: Standard 1/4′ mount
- Bottom screw: Standard 1/4″ mount
TELESIN 106″ Ultra Long Selfie Stick
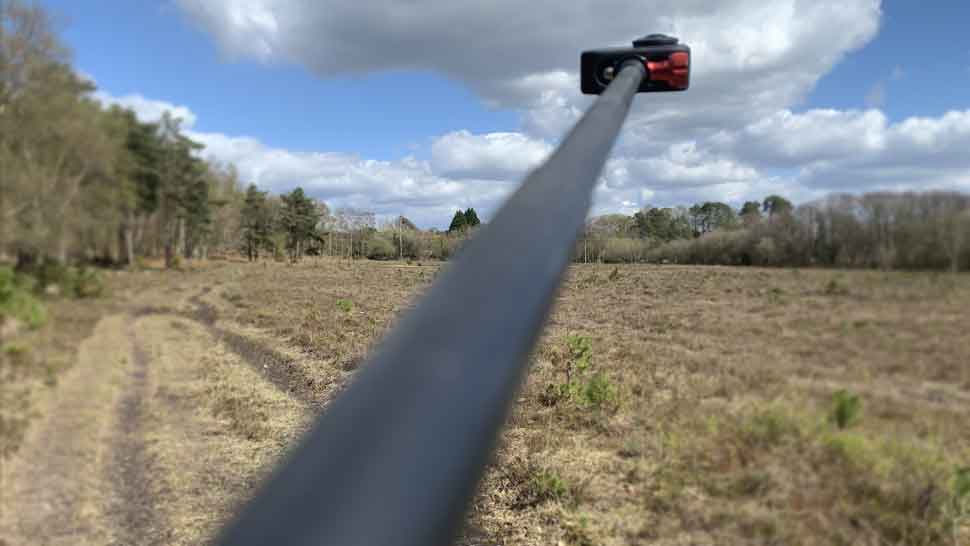
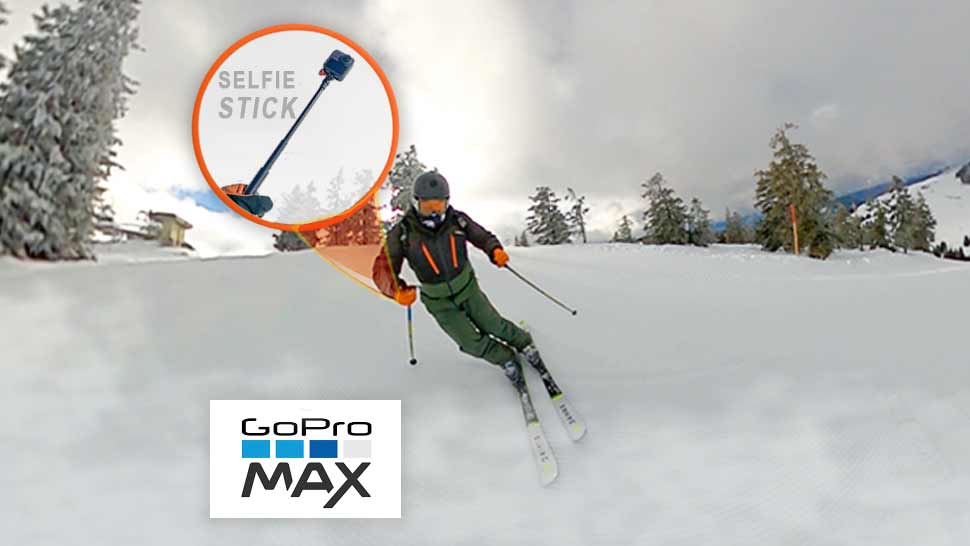
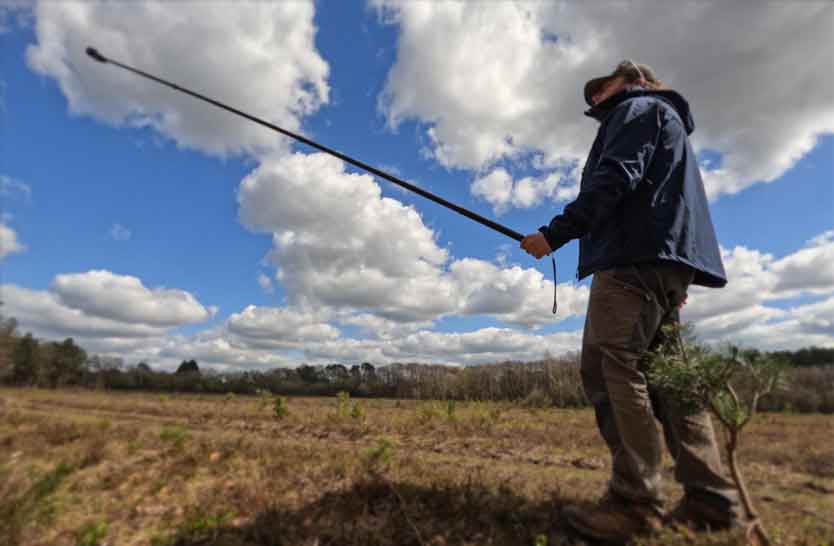
For even further extension I use the Telesin ultra long selfie stick for those far away shots which give the appearance similar to a hovering drone or “fake drone shot” as it’s also commonly called.
The ultra long selfie stick comes in two lengths, 2.7 meters and 3 meters. I prefer the 2.7 meter stick as I find this is the best combination between extended reach and stability.
Having the extra extended length does come with the drawback of the selfie stick bending under the weight of the camera. Once the camera is even slightly out of alignment with the centerline of the stick, the stick becomes visible.
- Length fully closed: Length 44.2 x Width 5.7 x Height 5.6 cm
- Length fully open: 2.7 meters / 8.85 ft
- Weight: 258.5g / 9.17oz
How To Make The Selfie Stick Invisible
Both of the selfie sticks we looked at earlier have a ¼ x 20 thread on the top of the pole. This allows you to screw a tripod mount adapter to the stick itself.
With the tripod adapter attached it’s just a matter of sliding the two fingers on the base of the GoPro into the adapter’s three-tongued attachment. Then finally tighten a shortened thumb screw securely to mount the camera to the selfie sticks ¼ x 20 thread.
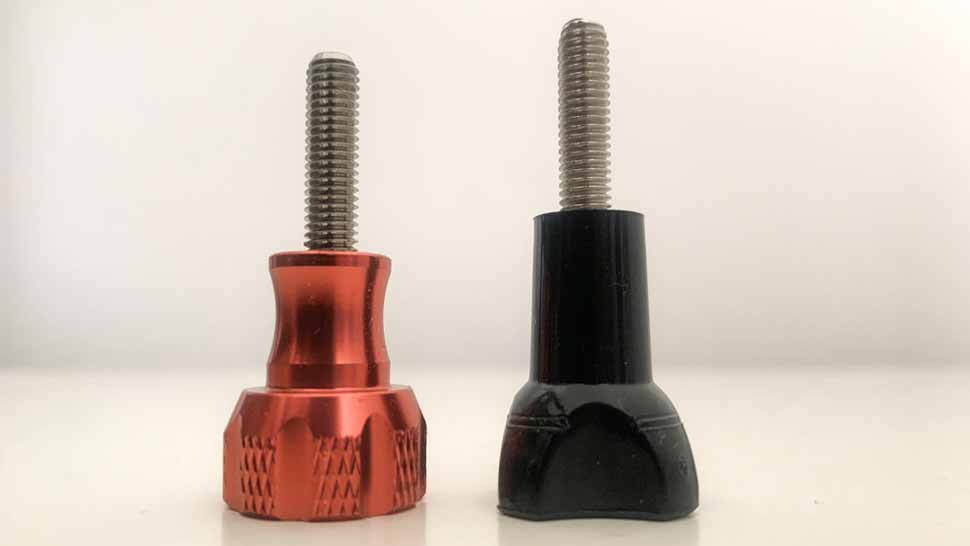
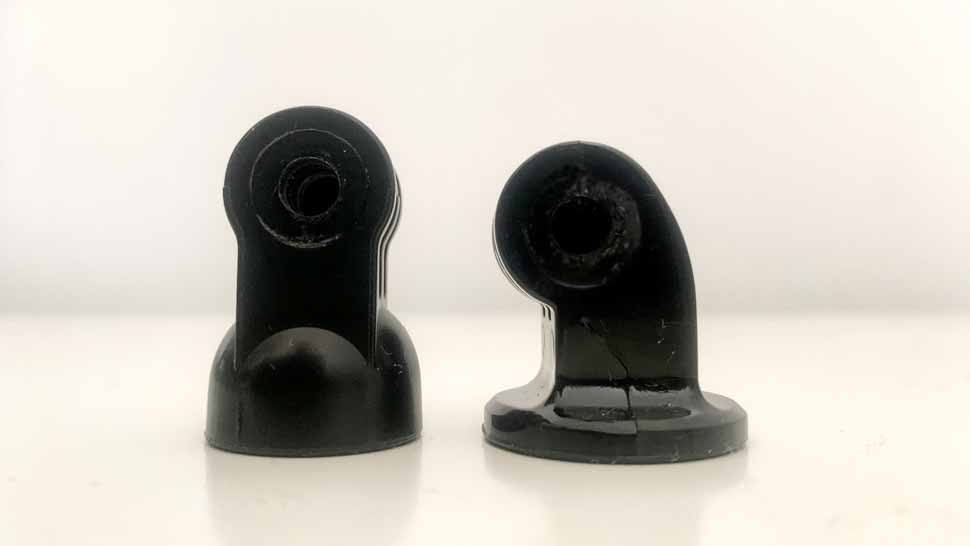
However not all tripod mount adapters are suitable for invisible sticks. If you take a look at the pictures below you’ll see the tripod mount on the left looks quite different to the mount on the right.
The key aim here is to mount the 360 degree camera perfectly in line with the center of the selfie stick. The Joby Mount retains the center line as it’s not offset compared to other GoPro tripod mounts.
Tripod Adapter Mounts
For the 360 degree cameras software to hide the stitch line and in doing so the selfie stick. The camera must be in line with the center of the stick. The Joby Tripod Mount allows you to achieve this alignment.
If you use one of the standard tripod mounts that have that slight offset then the camera’s software will be unable to hide the stitch line and therefore the selfie stick.
Joby Tripod Mount
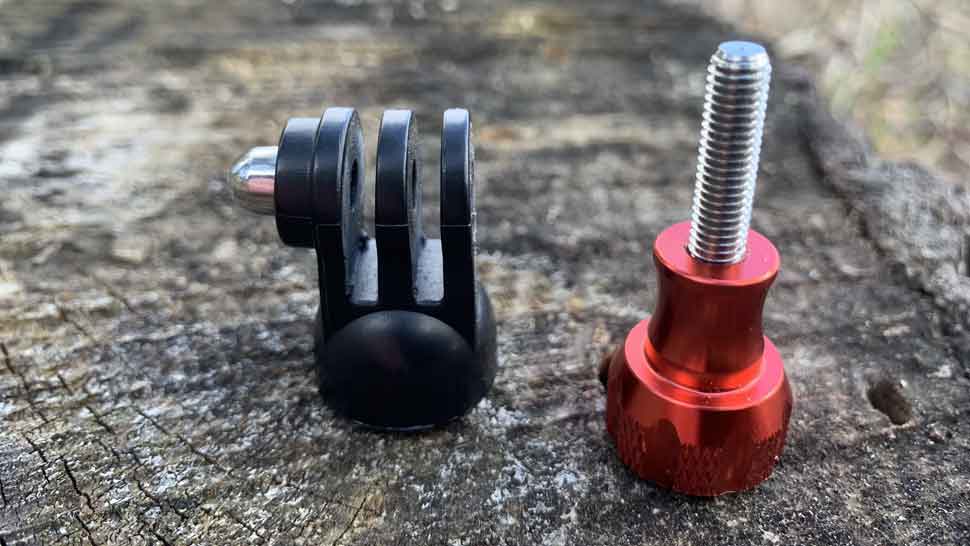
The Joby is the tripod mount of choice to be used with either of the selfie sticks mentioned earlier in this article. The term “pin joint” refers to the ¼ x 20 thread.
Pin Joint Mount
GoPro® style pin joint to ¼”-20 mount
Constructed of durable ABS plastic and stainless steel
New compact design with small footprint
Smatree Aluminum Tripod Mount Adapter
I’ve included the Smatree tripod mount as a reference to the standard tripod mounts that you want to avoid in setting up an invisible selfie stick.
Having said that, the Smatree is a great standard tripod mount for using with a tripod, just not for selfie sticks.
Selfie Stick Lanyards
I’d like to spend a moment discussing the use of lanyards and wrist straps with selfie sticks. I personally prefer to use a selfie stick with a lanyard attached for the following reasons.
Depending on what type of action sport your filming, a lanyard acts as a secure means of ensuring that the stick and camera don’t drop into inaccessible locations.
A typical example of potentially dropping the stick and camera is when riding on a ski chairlift. Imagine sitting there riding up the mountain recording a selfie shot. All of a sudden the chairlift judders to a halt and you drop the stick into the powder below.
Capturing 360 video in a kayak’s cockpit is also another great way of recording dynamic 360 degree video footage. A lanyard attached to your selfie stick is essential when doing any type of watersport to avoid losing your camera in a lake or river.
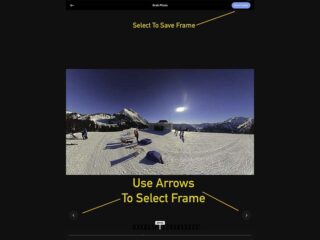
Reframing 360 Footage
Reframing is the term you’ll see and hear a lot when it comes to GoPro 360 video and photos. What this term means in essence is being able to change the point of view.
This is achieved by placing keyframes to dynamically move the 360 camera’s lens POV throughout the captured video footage.
GoPros Quik ios and desktop app imports 360 footage. Imported 360 photos and videos are reframed using the app’s editing features.
Final Thoughts
In summary, the first task is to choose a selfie stick. I’d suggest the Insta360 invisible selfie stick. Fit the Joby Tripod Mount to the ¼ x 20 thread at the top of the selfie stick.
Ensure the GoPro Max 360 is aligned to the center of the stick using a shortened thumb screw. Having a shorter thumb screw ensures the crew is stitched out of the shot inside the camera’s software.
Import the 360 footage into the Quik app and use the reframing features to export an edited video or photo with the selfie stick invisible to the viewer.
Following these tried and tested techniques will open up a whole new way of filming your 360 degree footage and hopefully you’ll have a lot of fun and a sense of achievement doing so.